customer support
Internet Support
@viscom.net Email Set-Up
legacy email
This tutorial was created running the Android 6 OS.
If you are using different hardware or a different OS version, these instructions may differ.
step 1
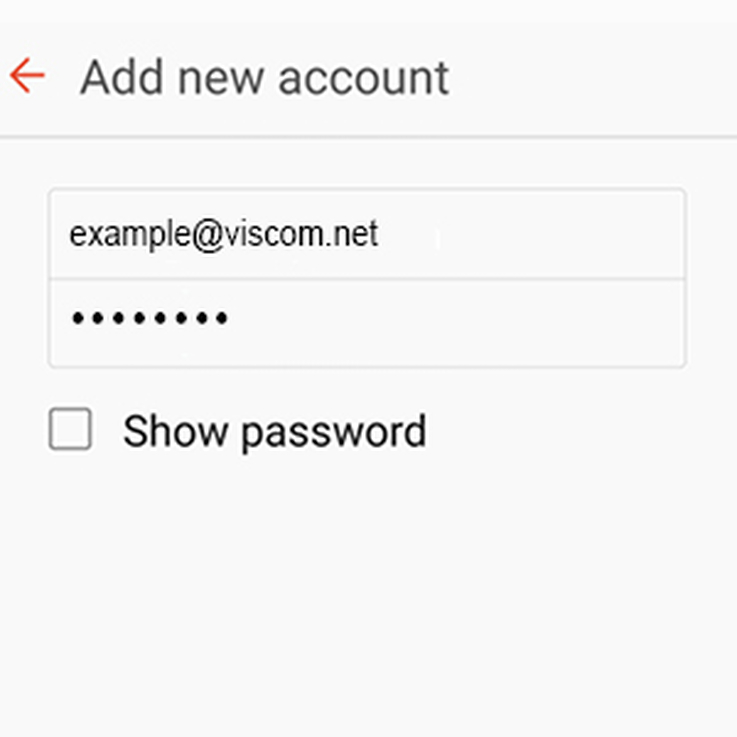
Open the email application, enter the following information and then select
- EMAIL ADDRESS
- PASSWORD
step 2
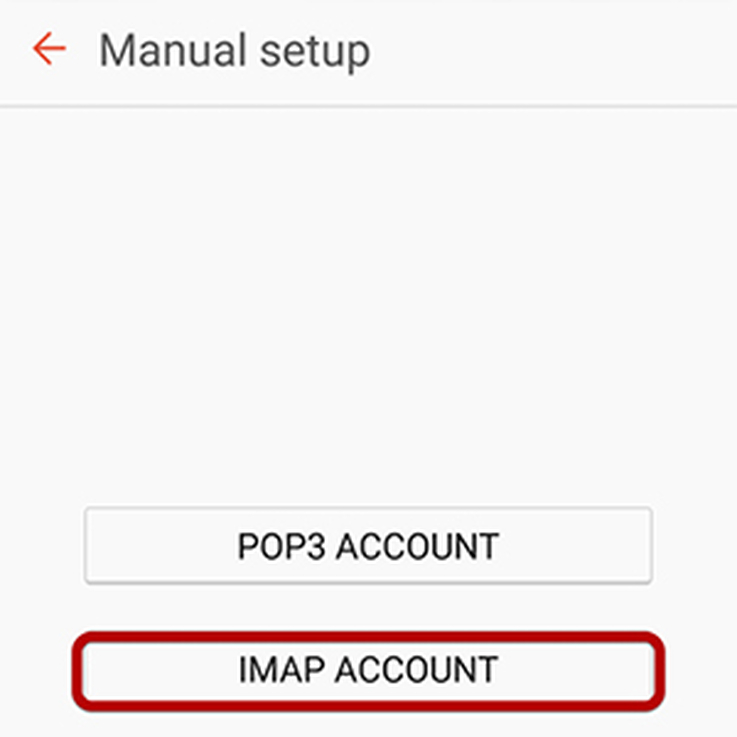
Select
step 3
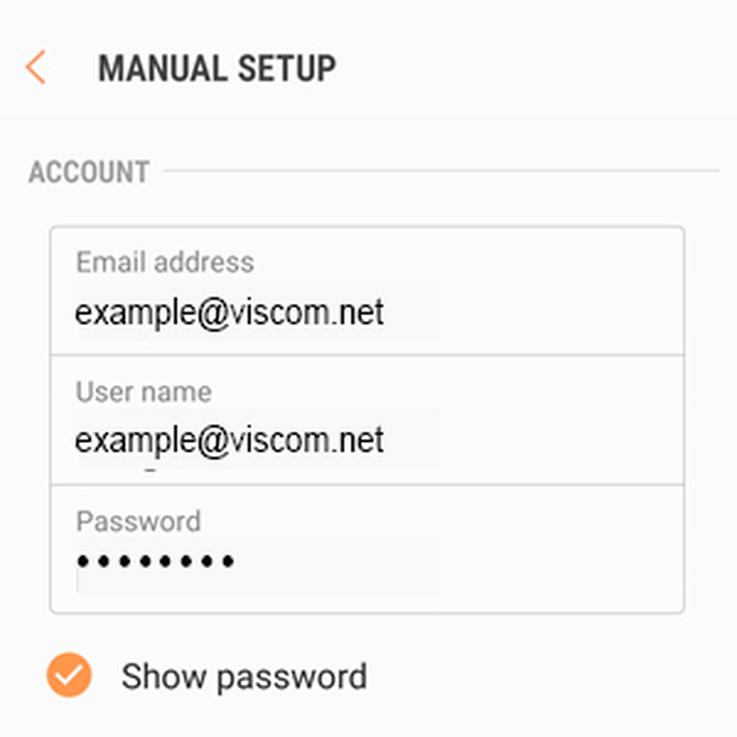
Enter the following email account settings:
- EMAIL ADDRESS:
[email protected] - USERNAME:
[email protected] - PASSWORD: The password field is automatically filled in with the password that you created when you set up your email account.
step 4
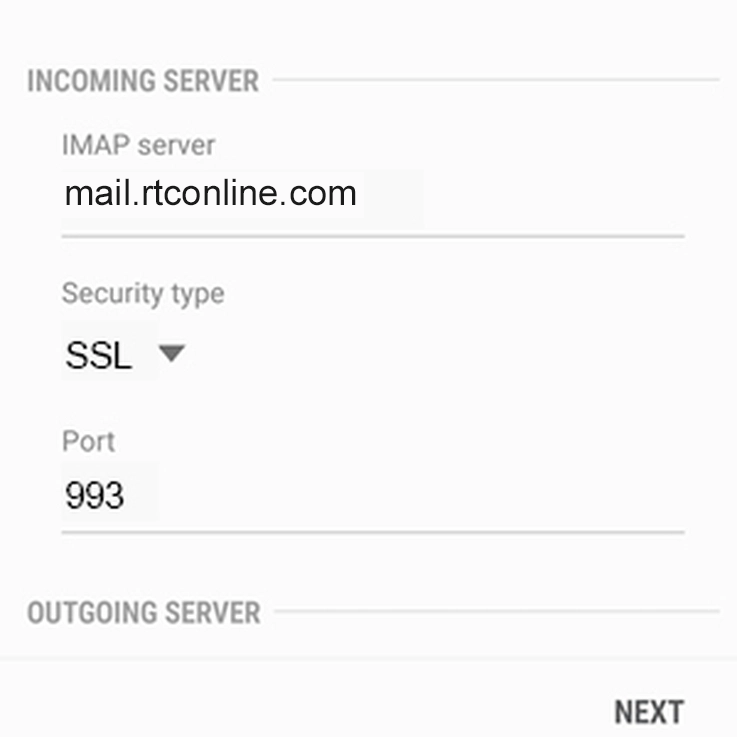
Enter the following INCOMING SERVER SETTINGS:
- IMAP SERVER:
mail.eatel.net - SECURITY TYPE:
SSL - PORT:
993
step 5
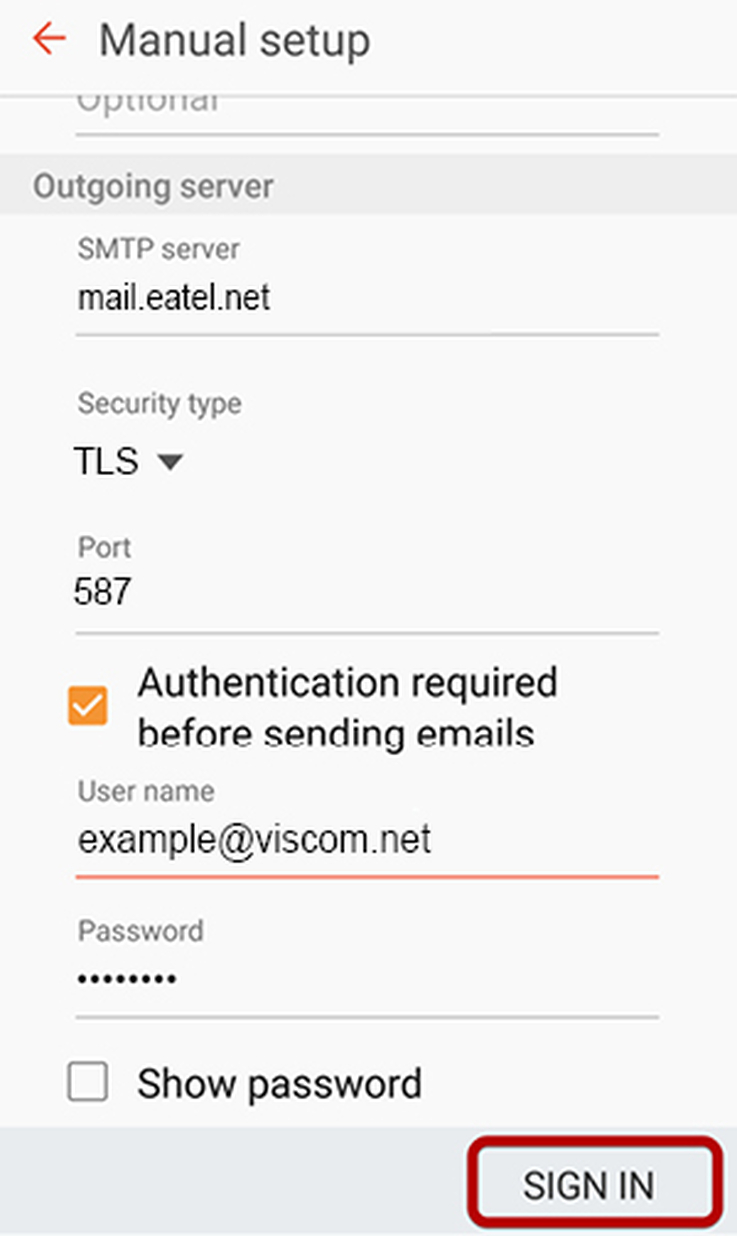
Enter the following OUTGOING SERVER SETTINGS:
- SMTP SERVER:
mail.eatel.net - SECURITY TYPE:
TLS - PORT:
587 - ADD CHECK MARK TO:
Authentication required before sending emails - USERNAME:
[email protected] - PASSWORD:
enter your email account password
step 6
Click
step 1
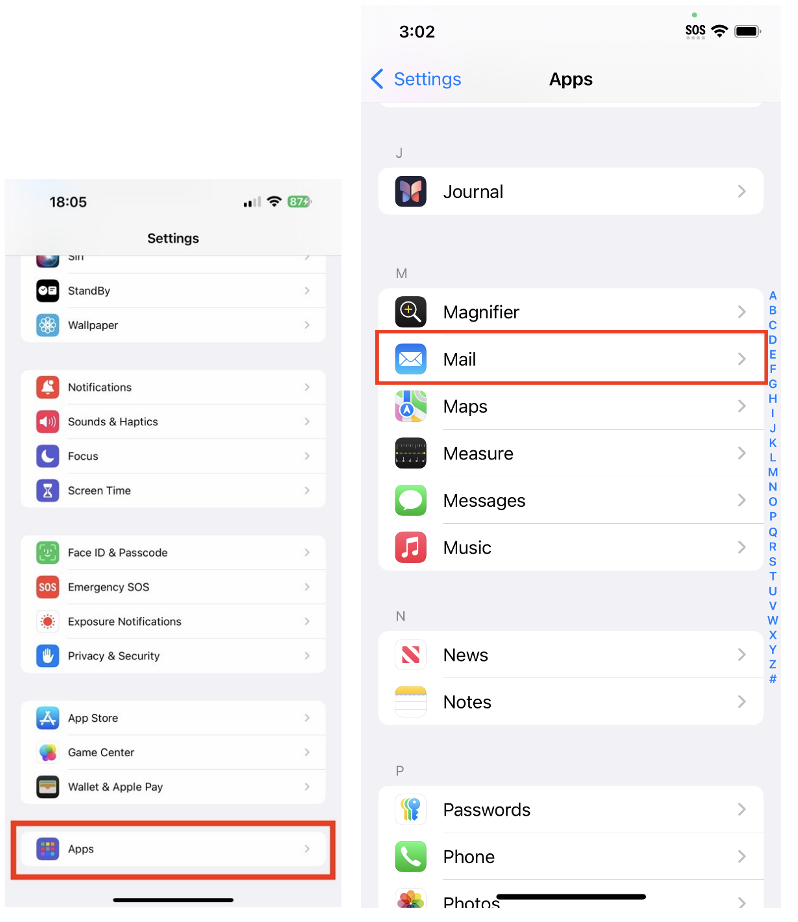
From the settings app, select Apps followed by Mail.
step 2
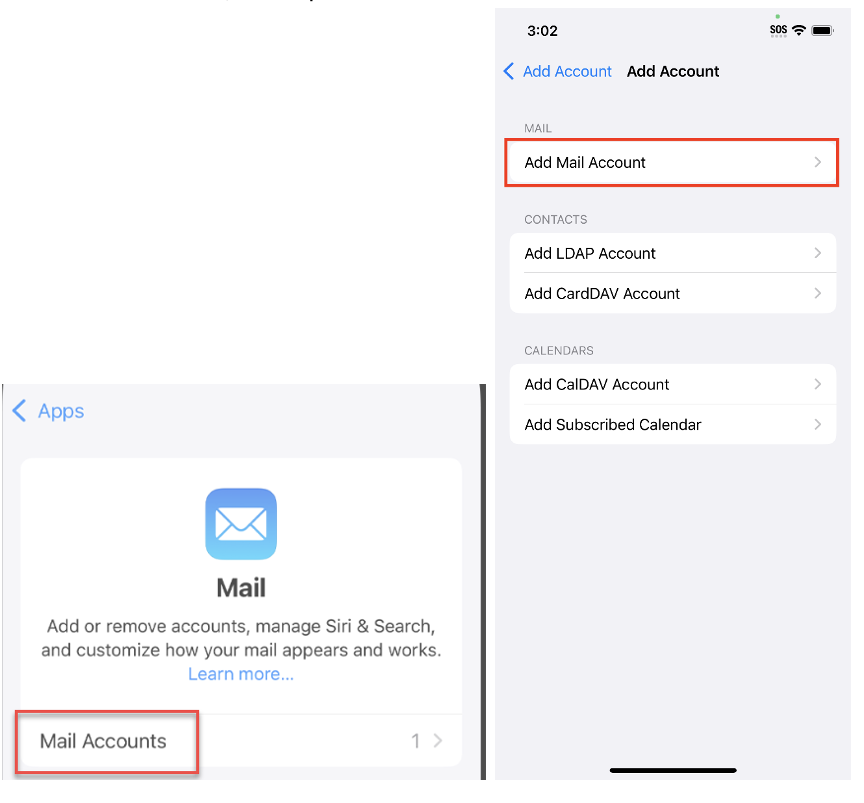
Select Mail Accounts, then tap Add Account.
step 3
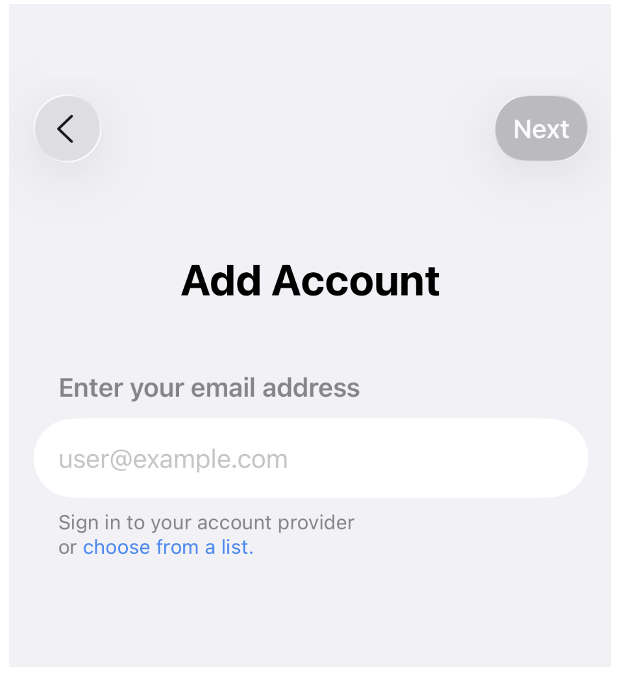
Enter your email address, then tap Next.
step 4
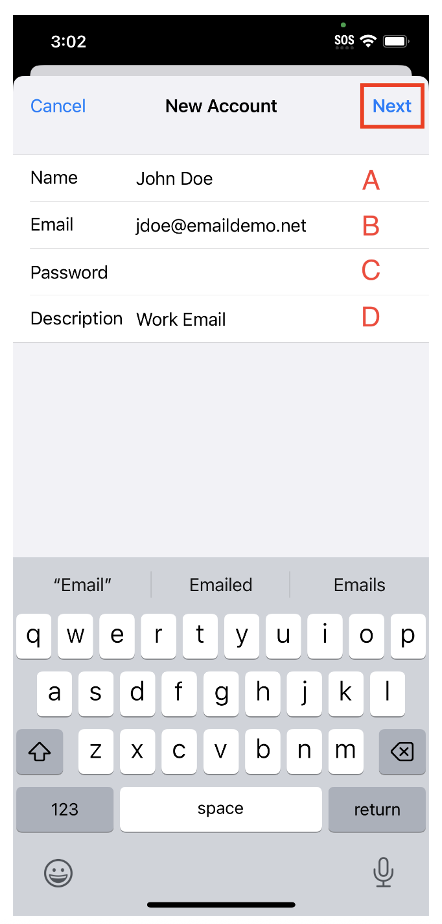
Enter your email account information. Click on Next.
- A) Enter your name, this will be the displayed name on all outgoing messages(what recipients see)
- B) Enter your email address
- C) Enter your password
- D) Enter a descriptionfor this account
step 5
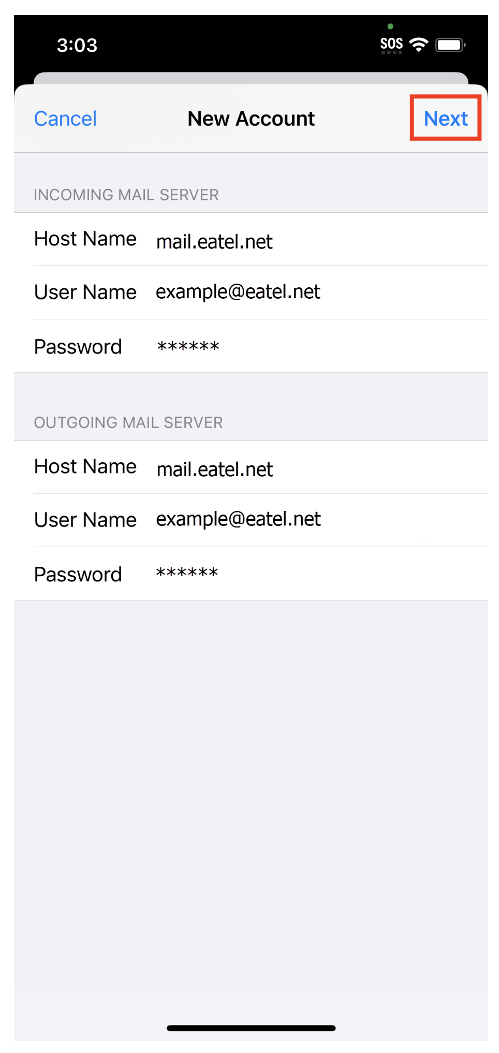
Make sure IMAP is selected.
Enter in the INCOMING & OUTGOING MAIL SERVER information.
INCOMING MAIL SERVER INFO
- HOST NAME: mail.eatel.net
- USERNAME: [email protected]
- PASSWORD: ******
OUTGOING MAIL SERVER INFO
- HOST NAME: mail.eatel.net
- USERNAME: [email protected]
- PASSWORD ******
The outgoing mail server fields will say it is optional. However, it is REQUIRED to send emails and is recommended to fill this information out at the time of set-up.
step 6
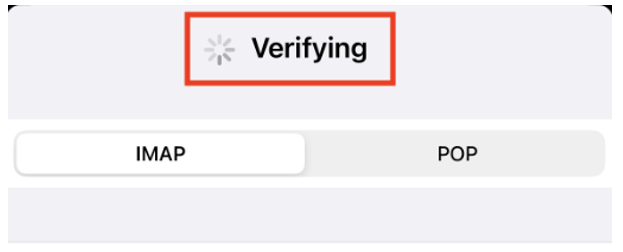
Click Next.
Your device will verify the login information.
Depending on your device, this may take several minutes to complete.
step 7
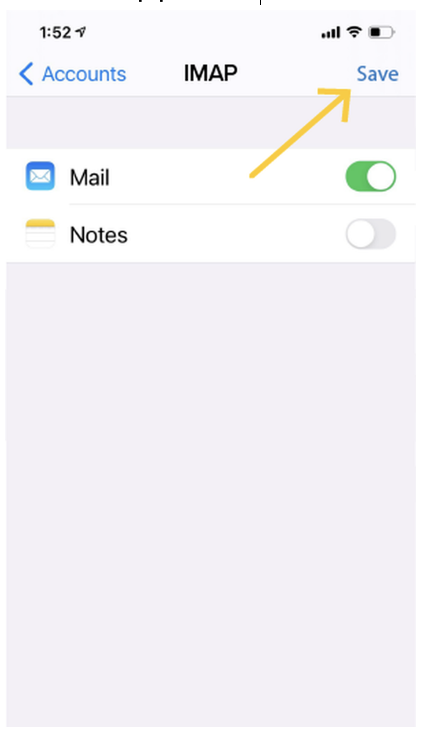
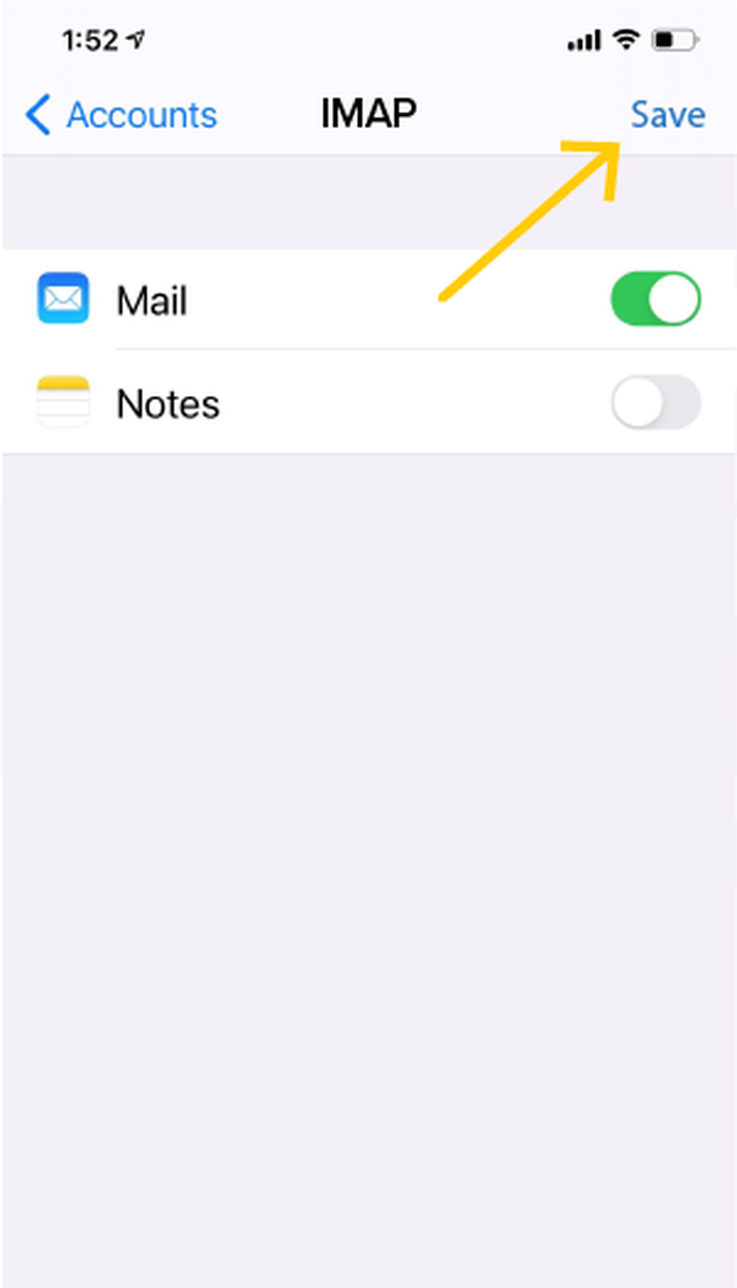
Once verification has completed, the next screen will show MAIL and NOTES, both with a switch next to them. You can leave those as is and click SAVE to complete the email set-up process.
step 1
From the settings app, select
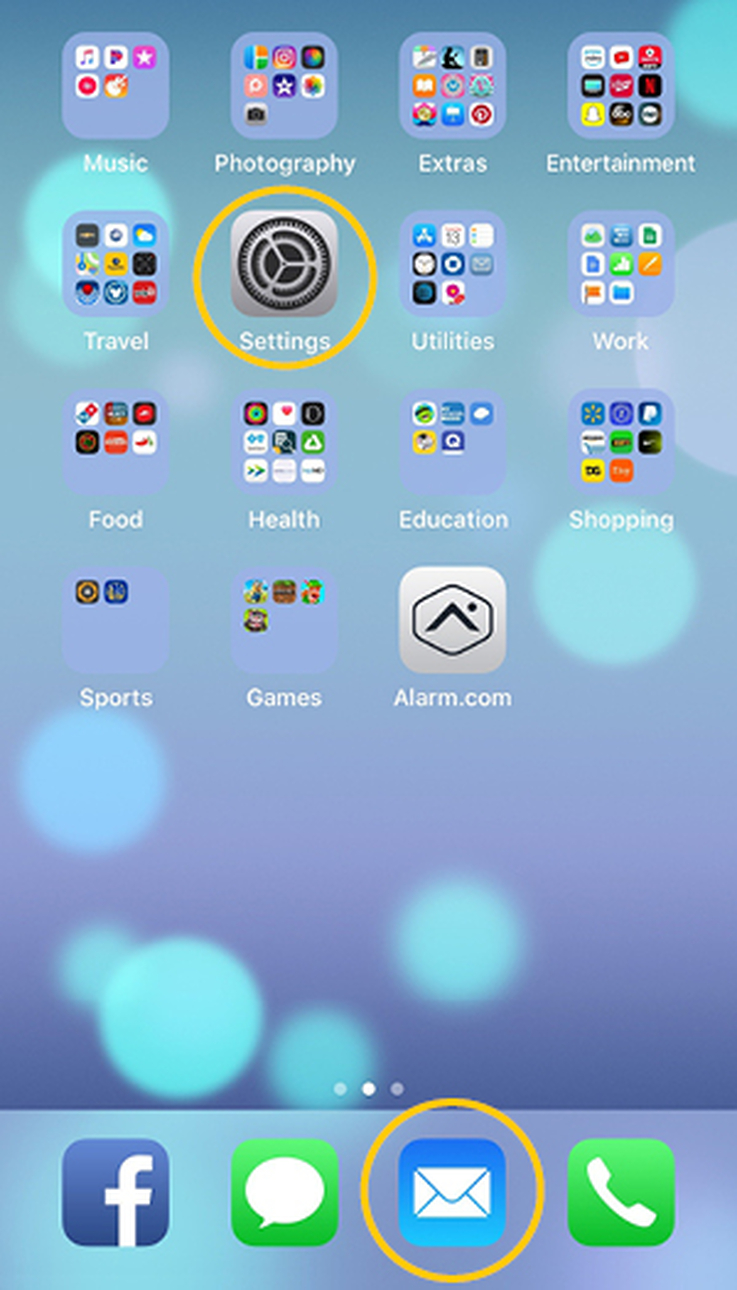
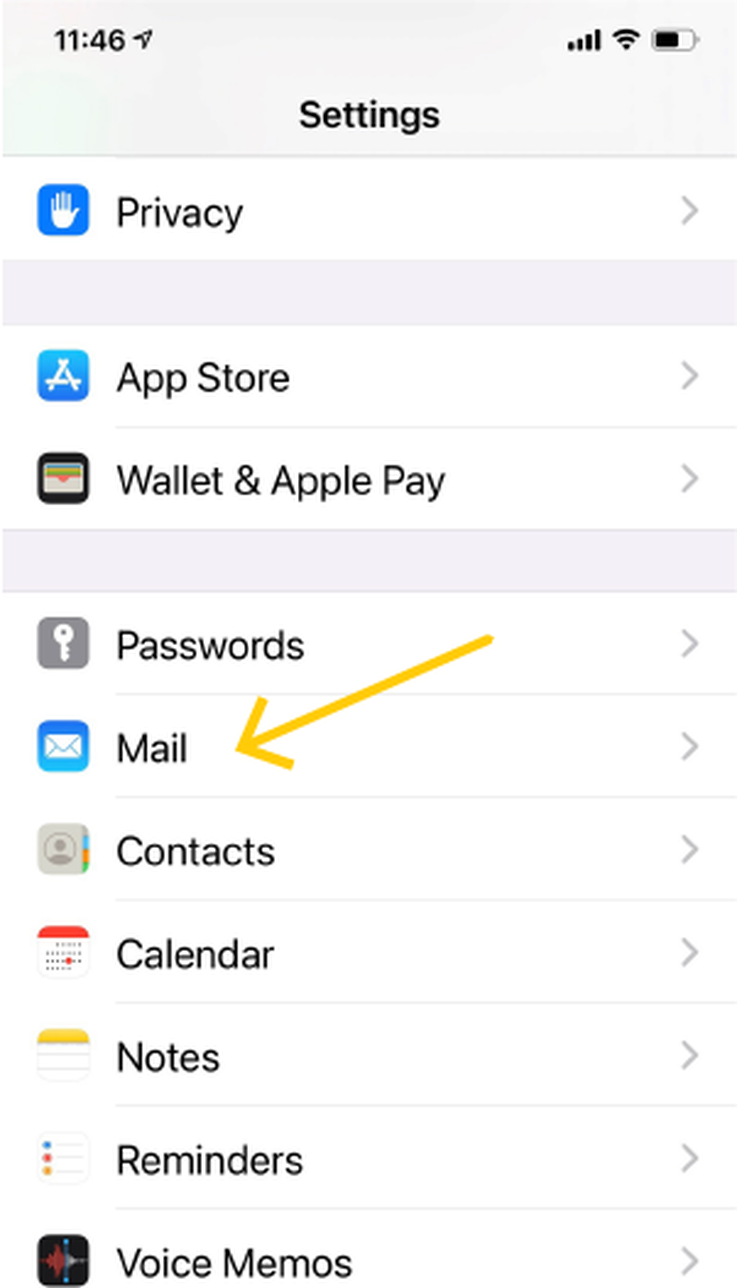
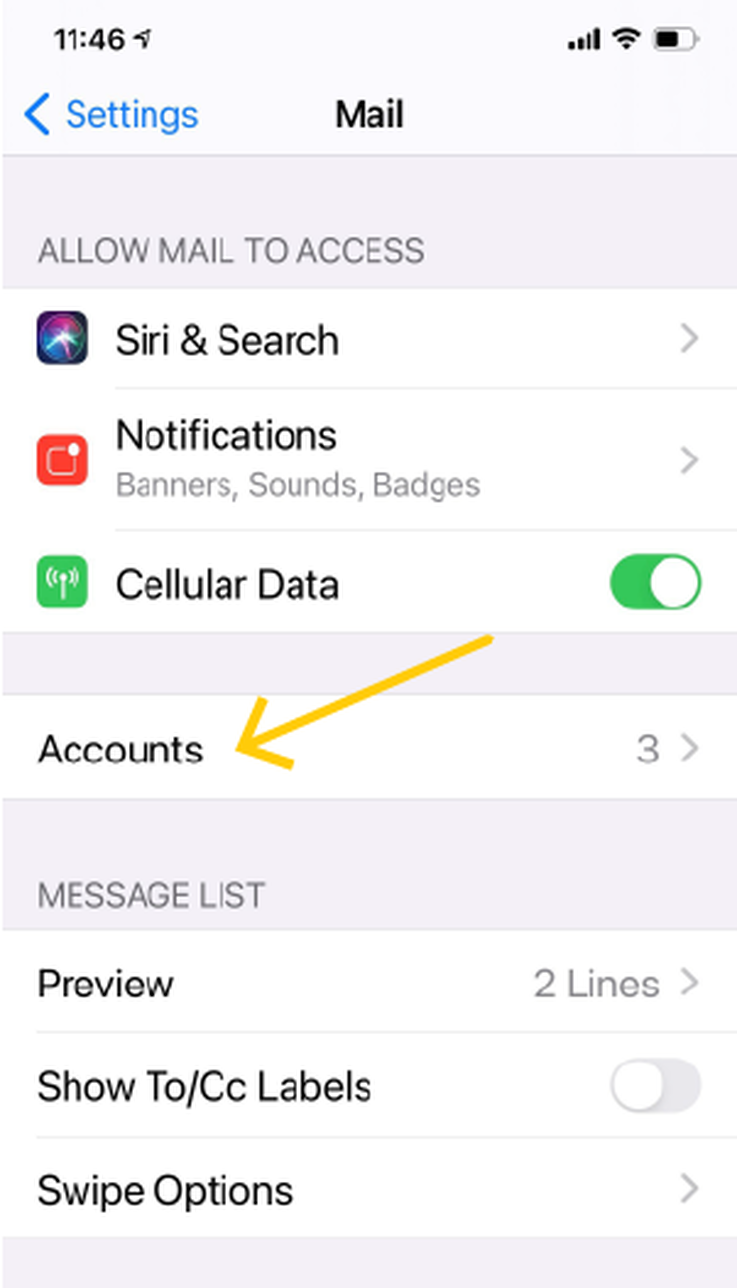
step 2
Click
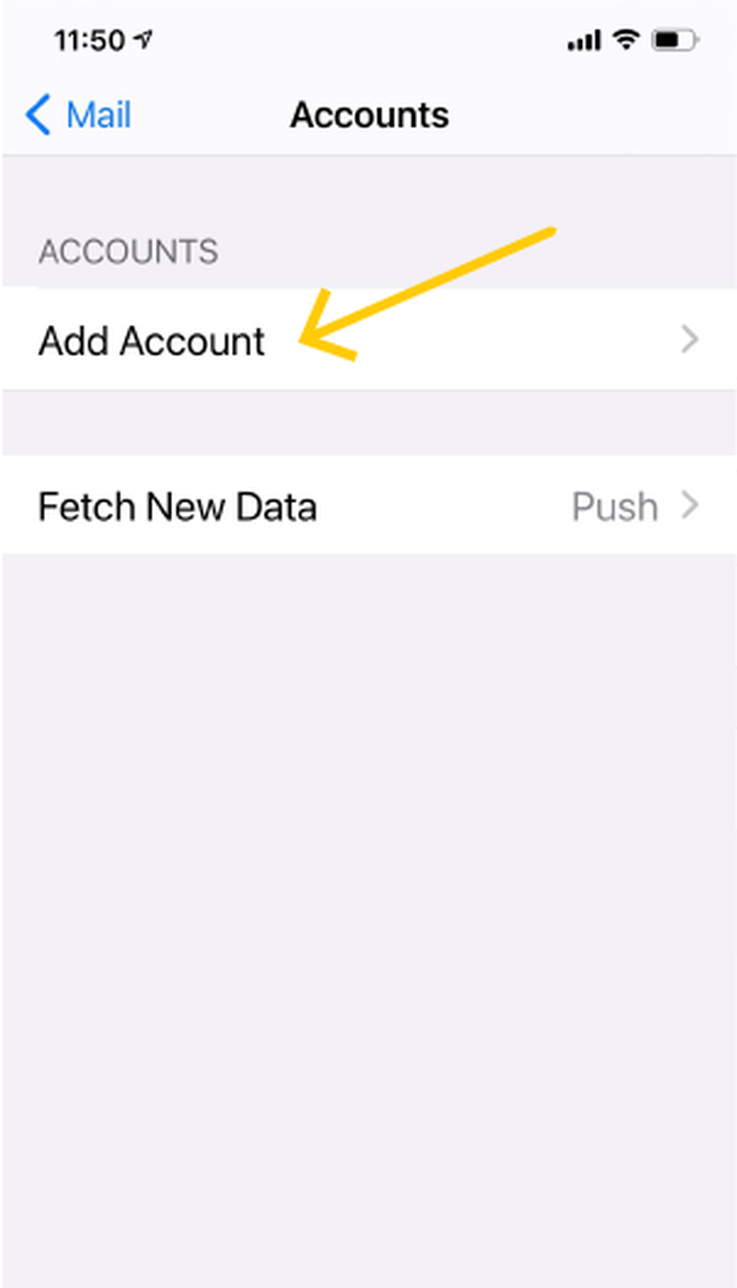
step 3
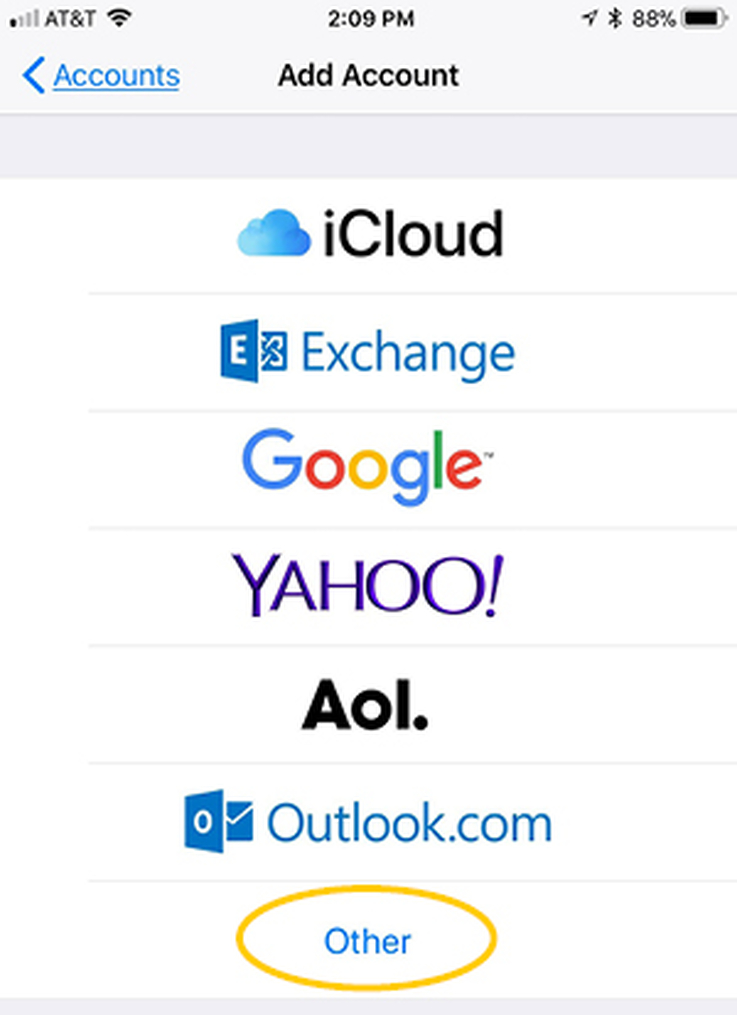
Select
*Other is the only account type that will work
with your @viscom.net email.
step 4
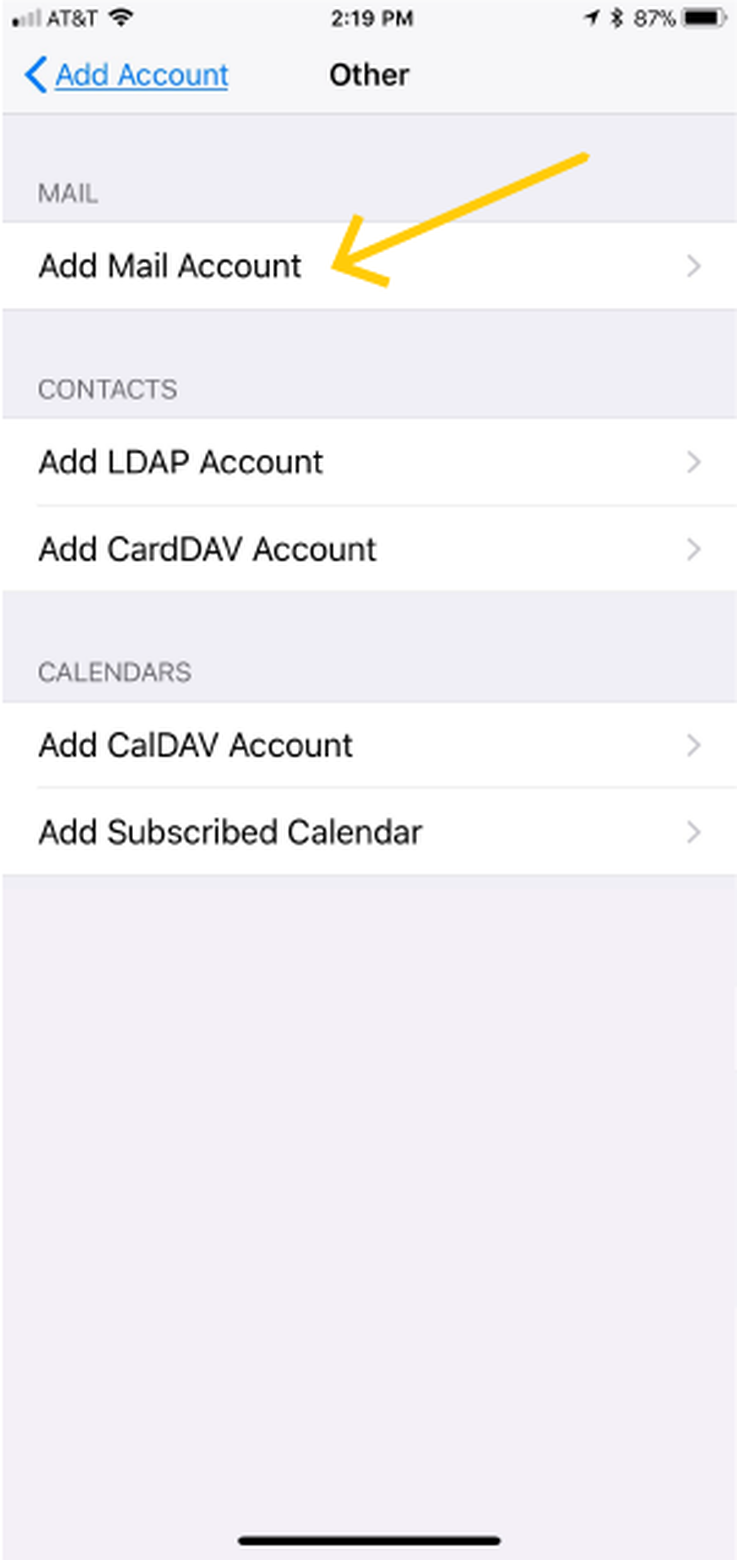
Click
step 5
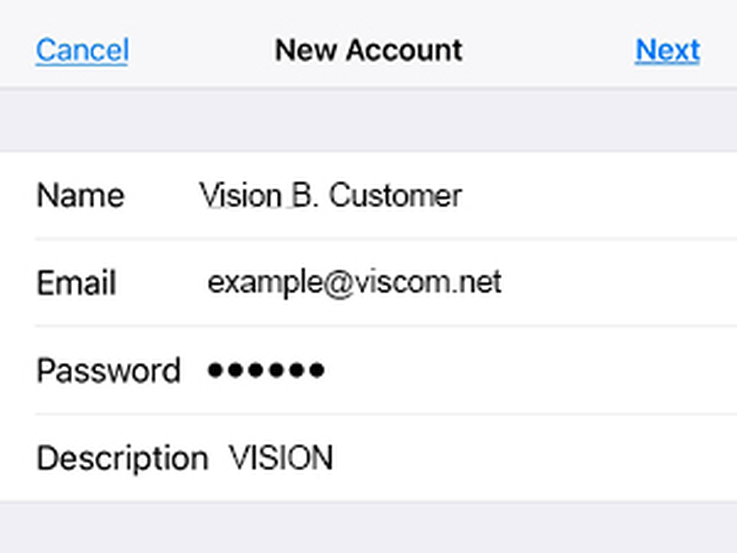
Enter the following information listed below and press
- NAME: Enter the name you wish recipients to see when they receive your message.
- EMAIL ADDRESS:
[email protected] - PASSWORD
****** - DESCRIPTION: When entering in your email address, VISION will automatically populate into this field.
step 6
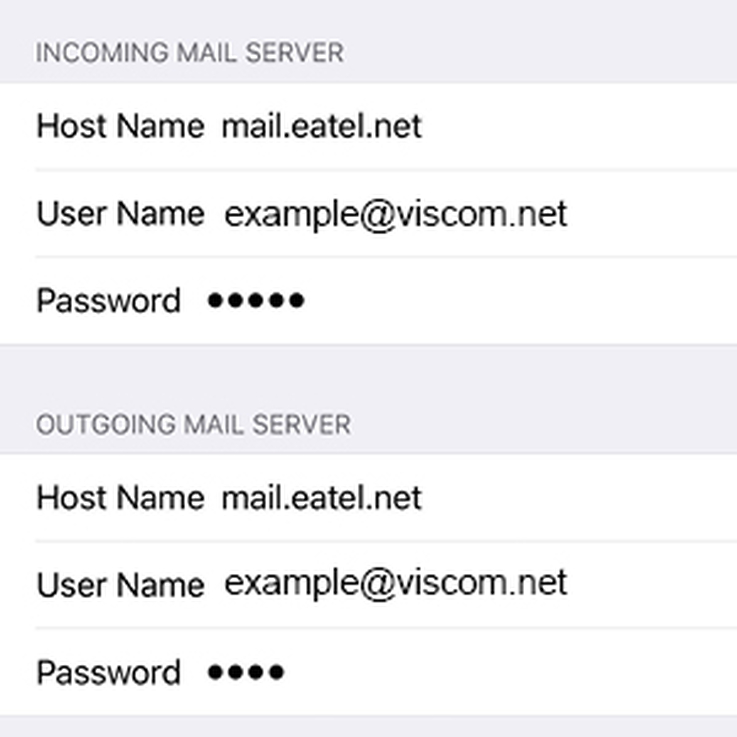
On the
- INCOMING MAIL SERVER INFO
- HOST NAME:
mail.eatel.net - USERNAME:
[email protected] - PASSWORD:
******
- OUTGOING MAIL SERVER INFO
- HOST NAME:
mail.eatel.net - USERNAME:
[email protected] - PASSWORD
******
The outgoing mail server fields will say it is optional. However, it is REQUIRED to send emails and is recommended to fill this information out at the time of set-up.
step 7
Scroll back to the top of your device and select
Your device will verify the login information.
Depending on your device, this may take several minutes to complete.
step 8
Once verification has completed, the next screen will show MAIL and NOTES, both with a switch next to them. You can leave those as is and click
step 1
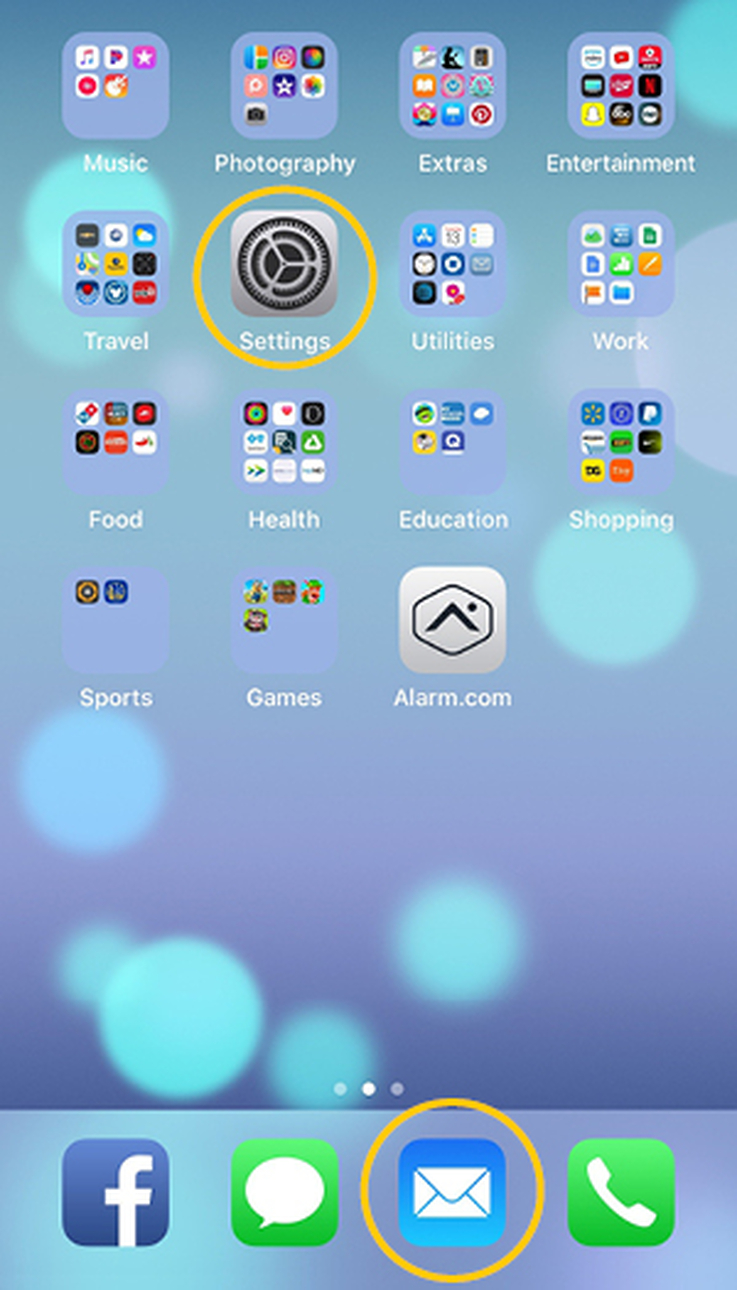
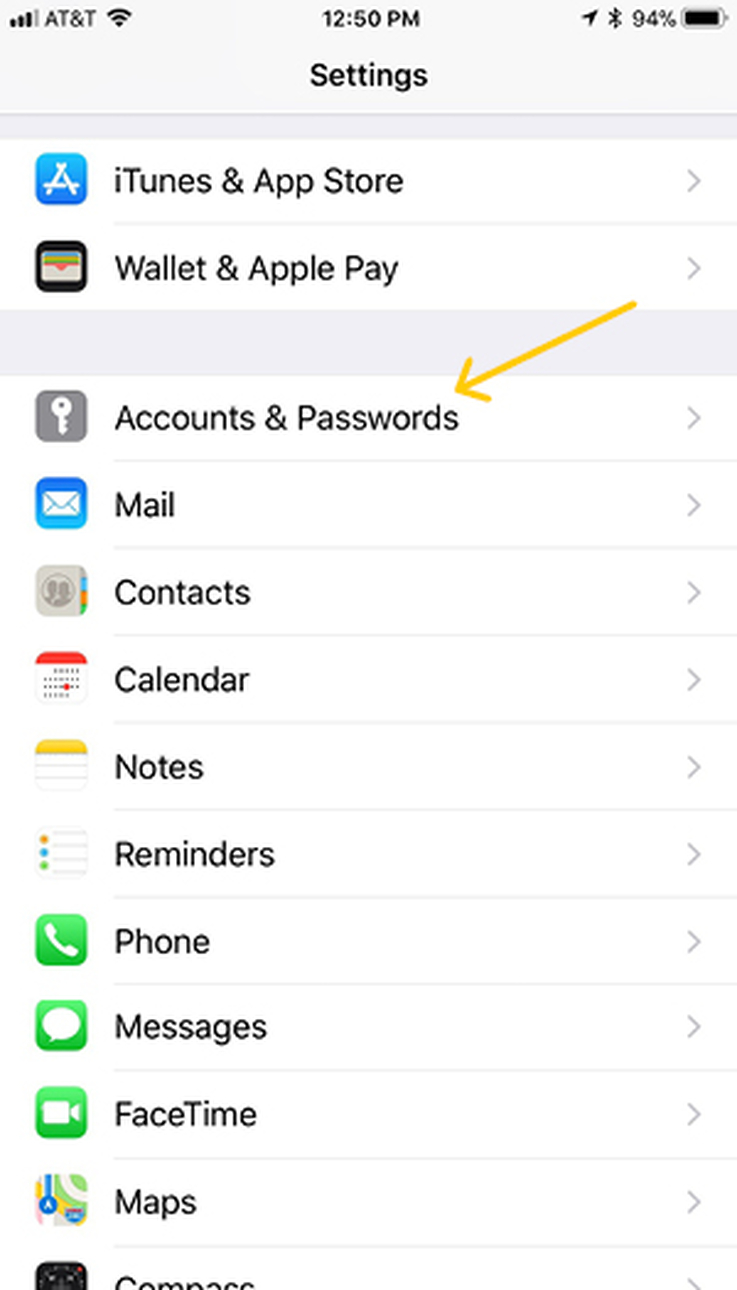
From the settings app, select
If this is the first account you’re setting up on your iPhone or iPad, tap the MAIL APP
step 2
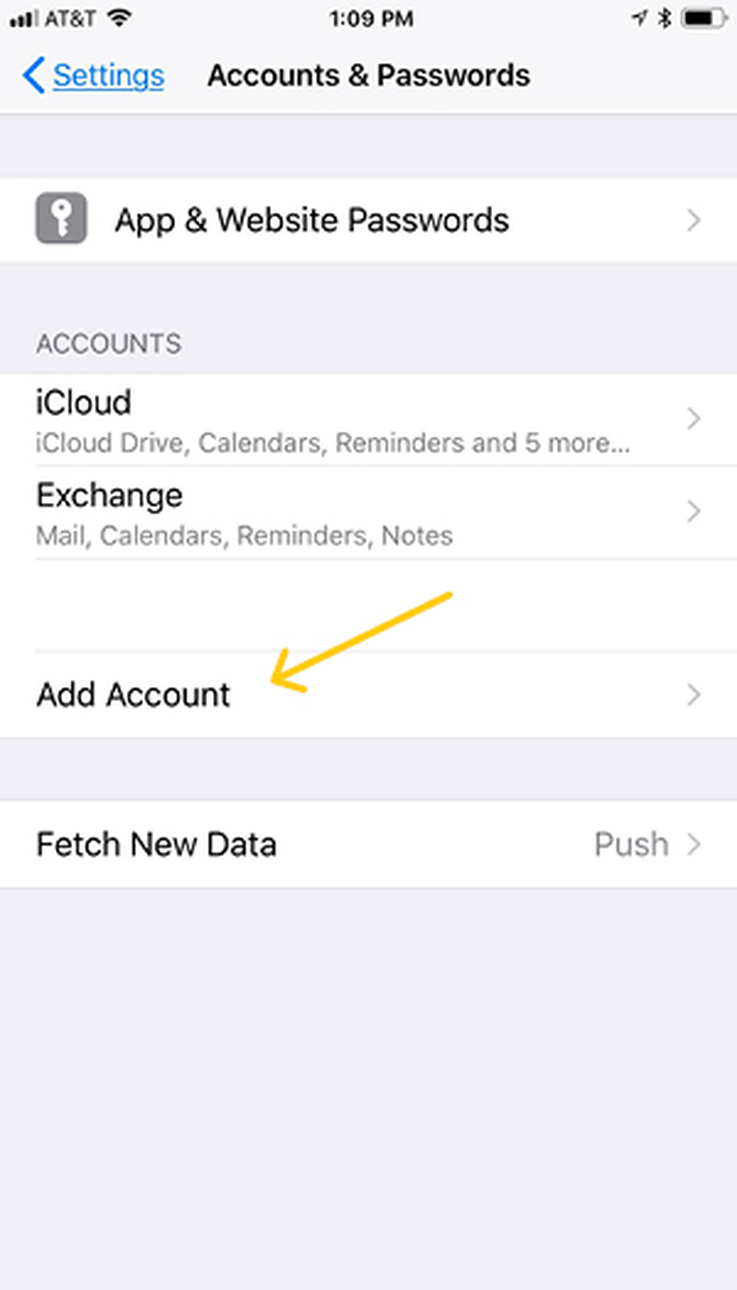
Select
*Other is the only account type that will work with your viscom.net email.

step 3
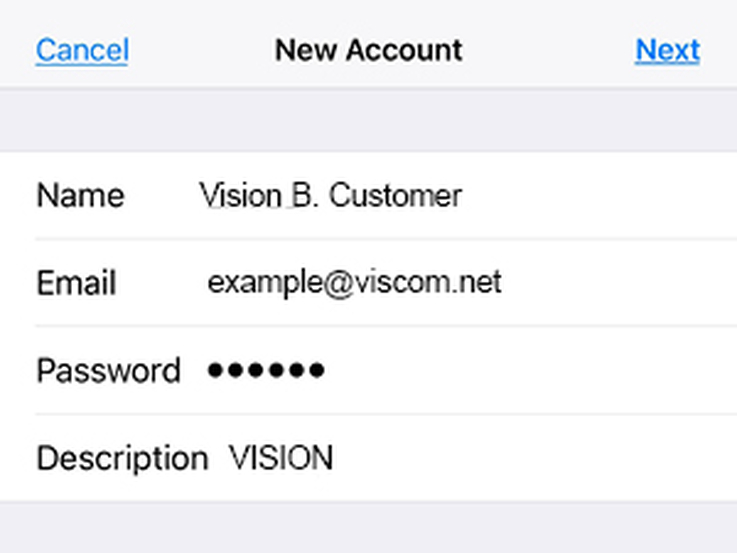
Enter the following information listed below and press
- NAME: Enter the name you wish recipients to see when they receive your message.
- EMAIL ADDRESS: [email protected]
- PASSWORD
****** - DESCRIPTION: When entering in your email address, VISION will automatically populate into this field.
step 4
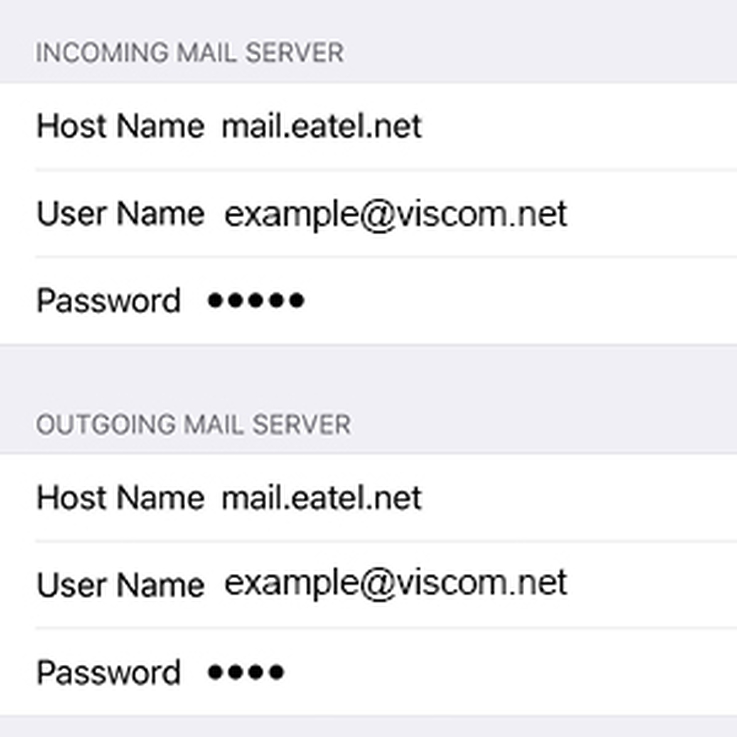
On the
- INCOMING MAIL SERVER INFO
- HOST NAME:
mail.eatel.net - USERNAME:
[email protected] - PASSWORD:
******
- OUTGOING MAIL SERVER INFO
- HOST NAME:
mail.eatel.net - USERNAME:
[email protected] - PASSWORD
******
The outgoing mail server fields will say it is optional. However, it is REQUIRED to send emails and is recommended to fill this information out at the time of set-up.
step 5
Scroll back to the top of your device and select
Your device will verify the login information.
Depending on your device, this may take several minutes to complete.
step 6
Once verification has completed, click
step 1
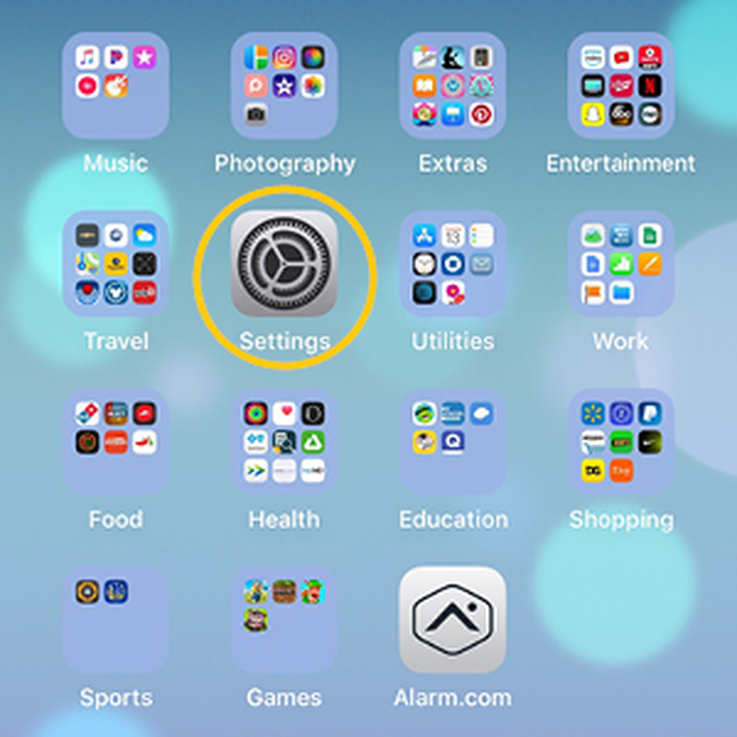
From the home screen, click on
step 2
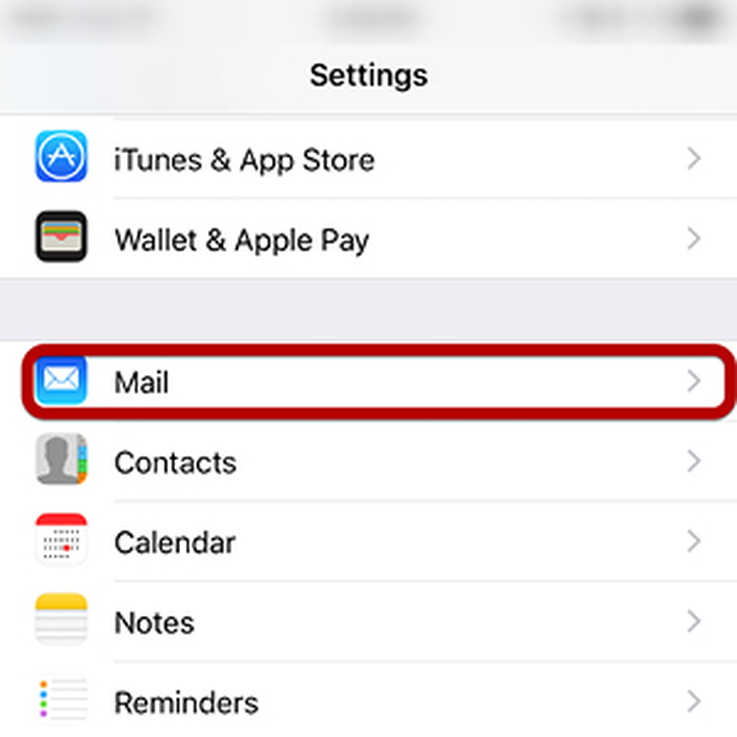
click on
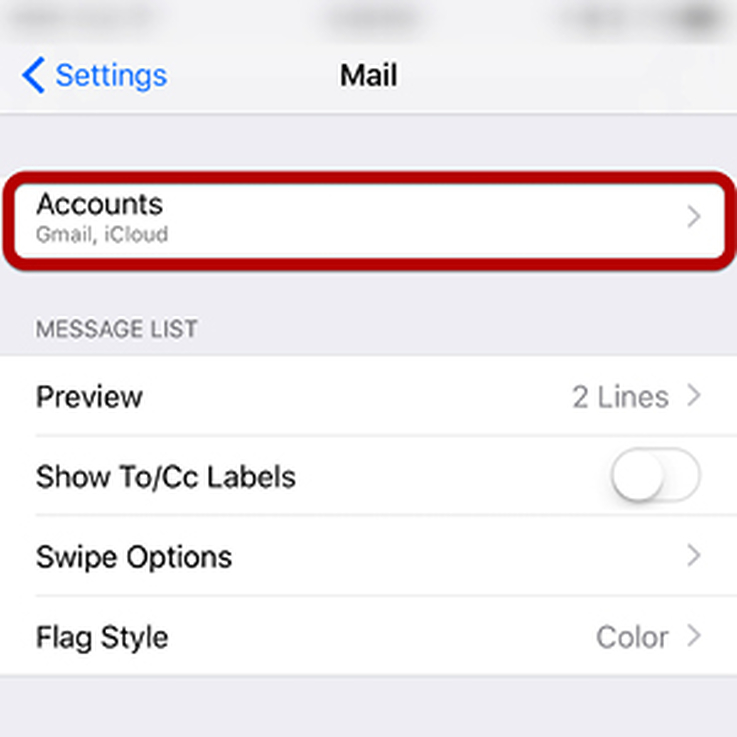
step 3
click on
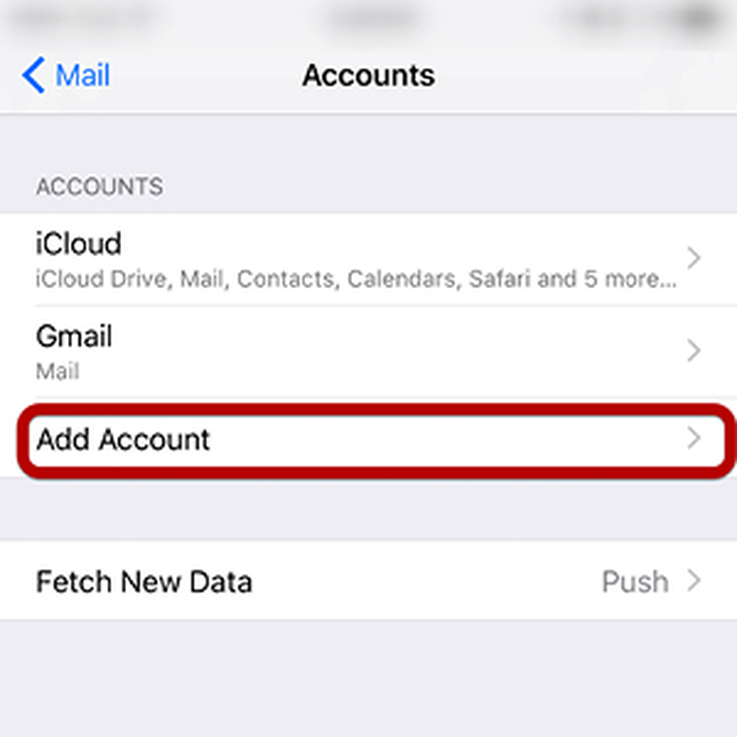
step 4
click on
step 5
Select
*Other is the only account type that will work
with your @viscom.net email.

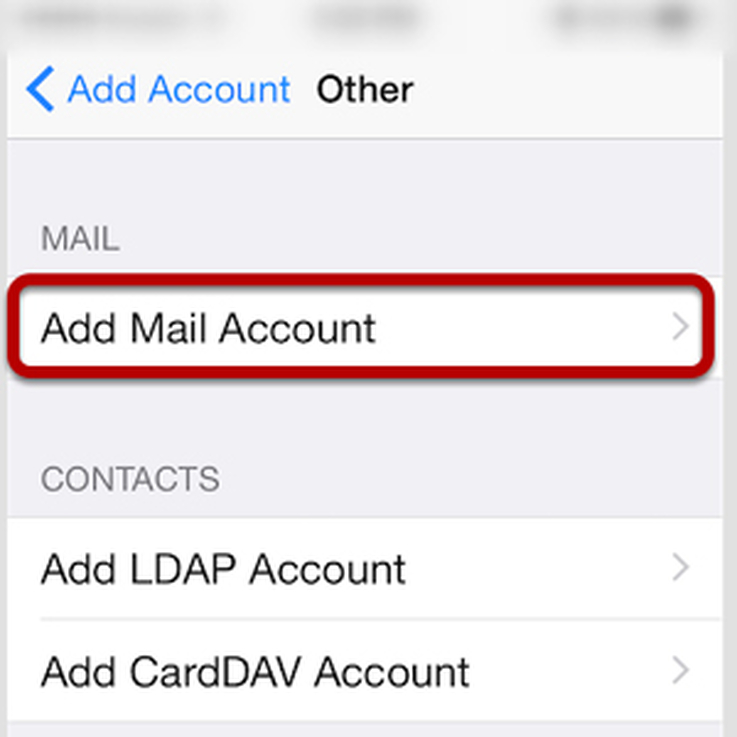
step 6
Click
step 7
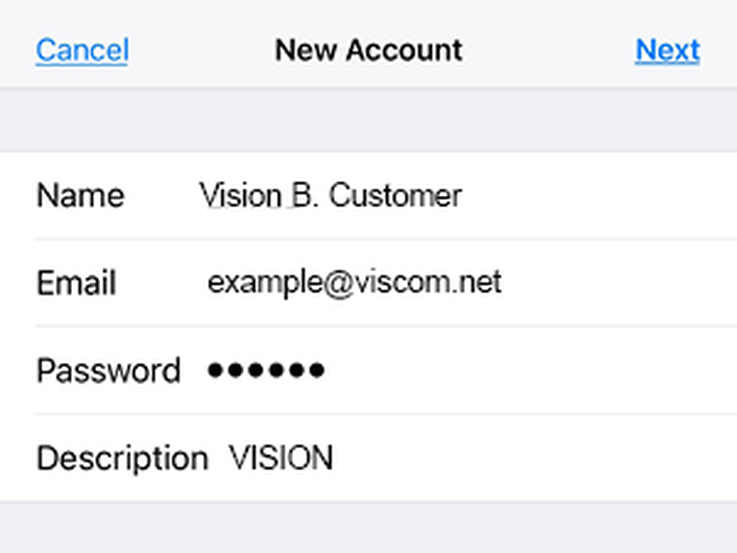
Enter the following information listed below and press
- NAME: Enter the name you wish recipients to see when they receive your message.
- EMAIL ADDRESS:
[email protected] - PASSWORD
****** - DESCRIPTION: When entering in your email address, VISION will automatically populate into this field.
step 8
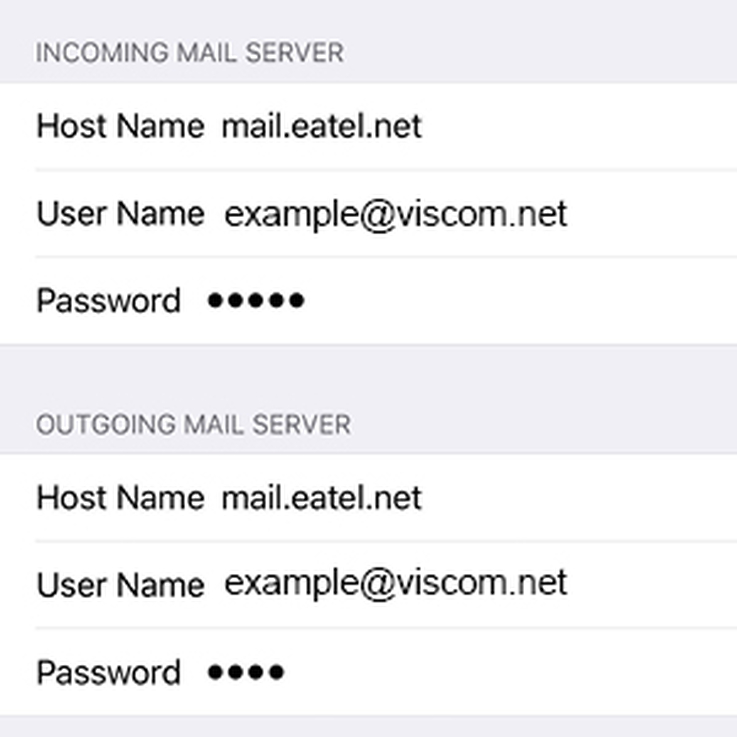
On the
INCOMING MAIL SERVER INFO
- HOST NAME:
mail.eatel.net - USERNAME:
[email protected] - PASSWORD:
******
OUTGOING MAIL SERVER INFO
- HOST NAME:
mail.eatel.net - USERNAME:
[email protected] - PASSWORD
******
The outgoing mail server fields will say it is optional. However, it is REQUIRED to send emails and is recommended to fill this information out at the time of set-up.
step 9
Scroll back to the top of your device and select
Your device will verify the login information.
Depending on your device, this may take several minutes to complete.
step 10
Once verification has completed, click
In this tutorial we will be guiding you through the process of configuring email on Mac Mail.
We are using Mac Mail Version 10.2 on OS X . If you are using a different version or operating system, these instructions may differ.
step 1
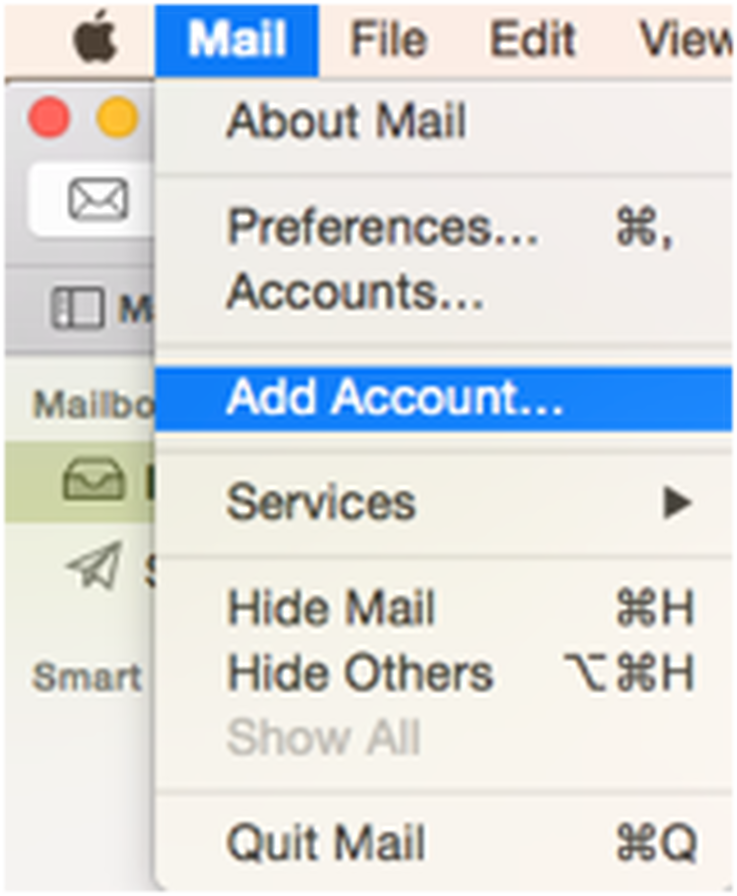
From Mac Mail, click on
step 2
Select
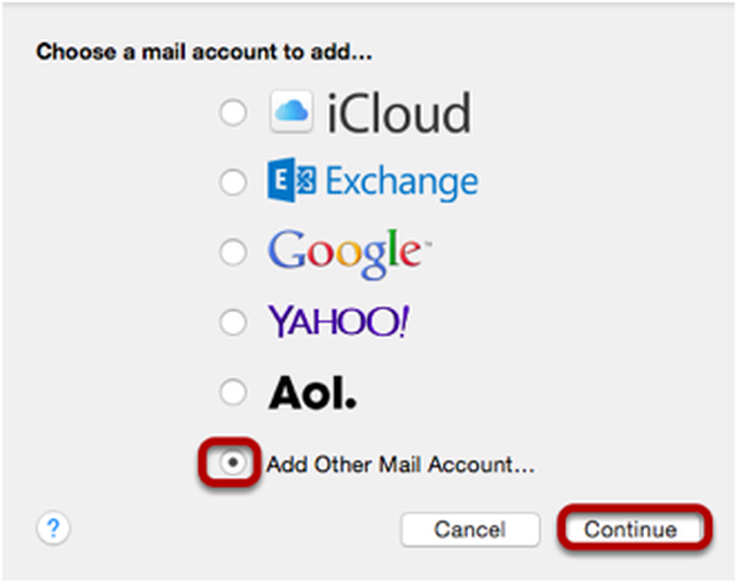
step 3
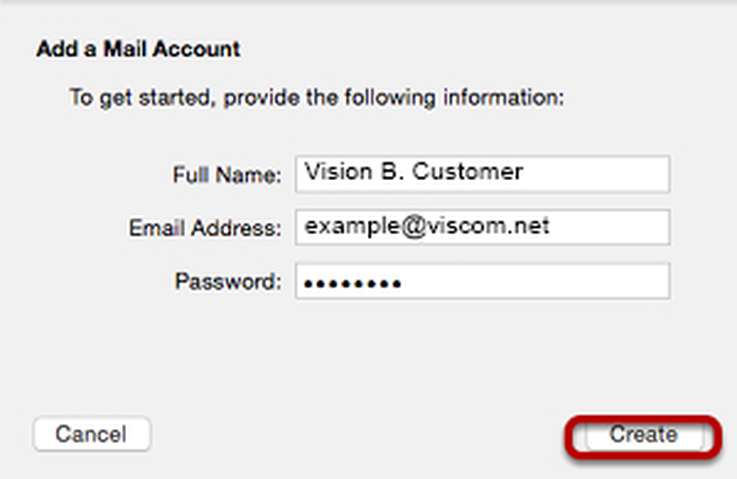
Enter the following information listed below:
- NAME: Enter the name you wish recipients to see when they receive your message.
- EMAIL ADDRESS:
[email protected] - PASSWORD
******
Click
step 4
The system will prompt you that manual account configuration is required.
Click
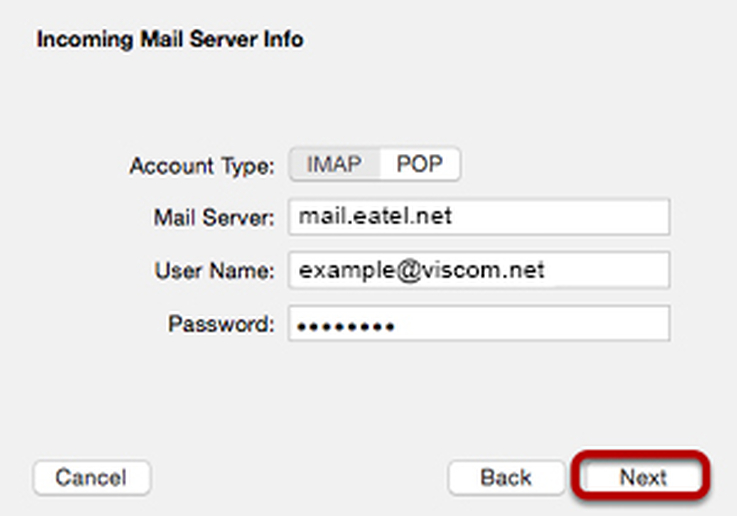
step 5
On the
- HOST NAME:
mail.eatel.net - USERNAME:
[email protected] - PASSWORD:
******
Click
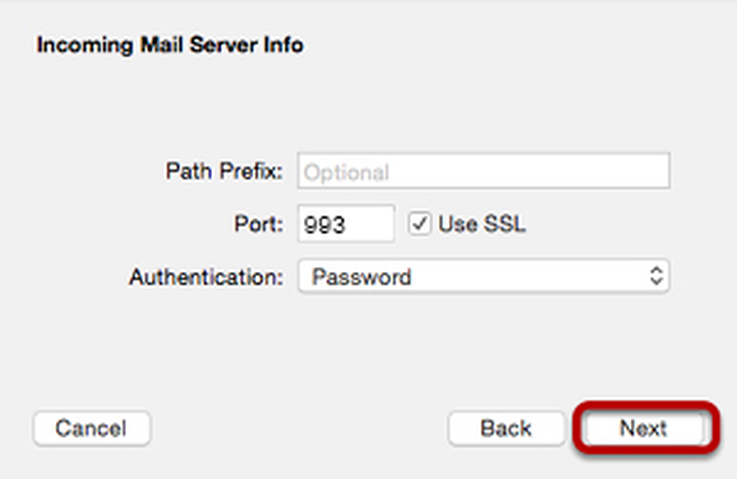
step 6
Enter the following INCOMING PORT SETTINGS:
- PORT:
993 - ADD CHECK MARK TO:
use SSL - AUTHENTICATION: select password from drop-down list
Click
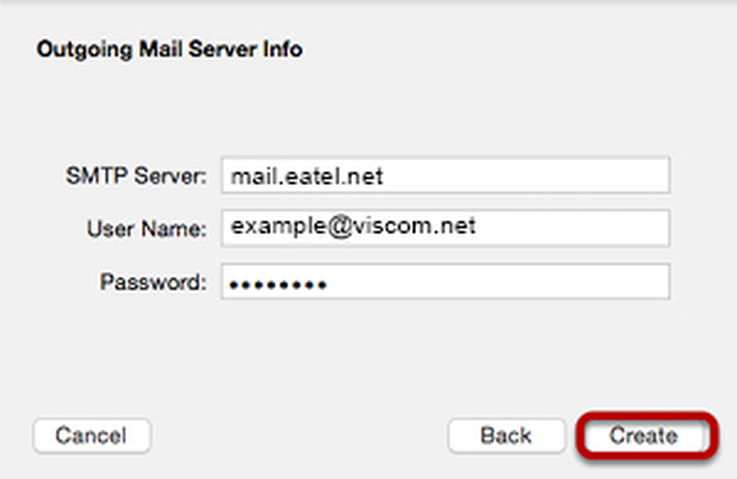
step 7
Enter the following OUTGOING SERVER SETTINGS INFO:
- SMTP SERVER:
mail.eatel.net - USERNAME:
[email protected] - PASSWORD: enter your email account password
Click
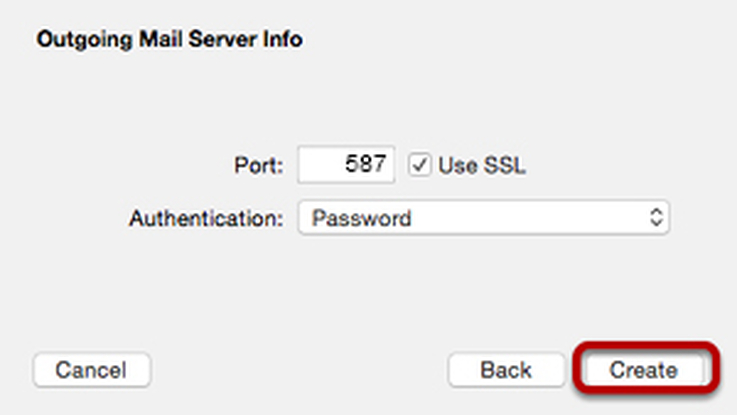
step 8
Enter the following OUTGOING PORT SETTINGS:
- PORT:
587 - ADD CHECK MARK TO:
use SSL - AUTHENTICATION: choose password
Click
This tutorial will walk you through the configuration of email using Outlook. Outlook 2016 was used for this tutorial. If you are using a different version or operating system, these instructions may differ.
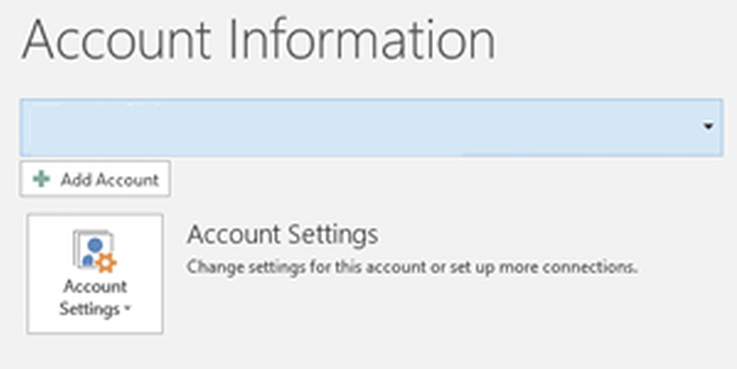
step 1
From the OUTLOOK FILE menu, select
step 2
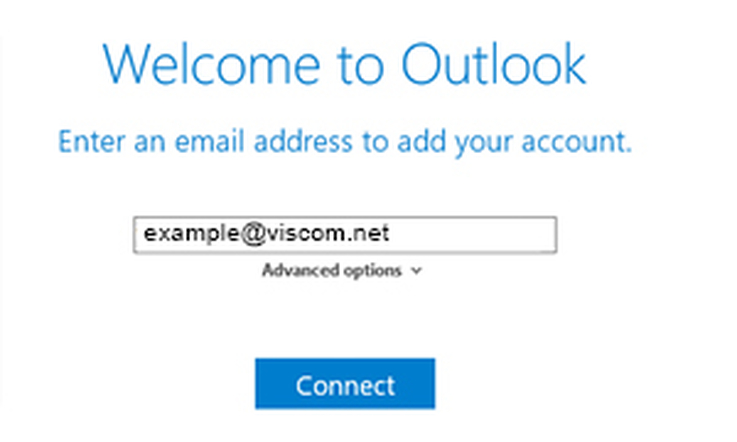
Enter your full email address and click
step 3
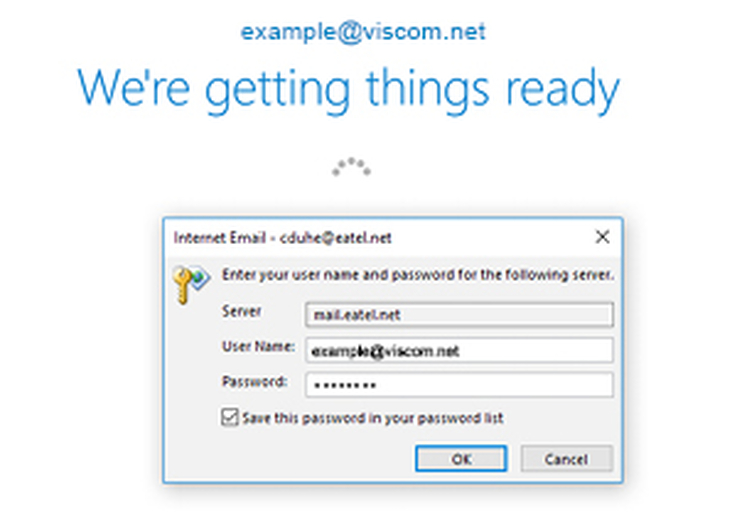
Enter in the
If setup had an error in it, see Manual Setup Instructions below.
OUTLOOK: manual email set-up
step 1
If an error occurred during setup, go back and click
Add a check mark to LET ME SETUP MY ACCOUNT MANUALLY and click

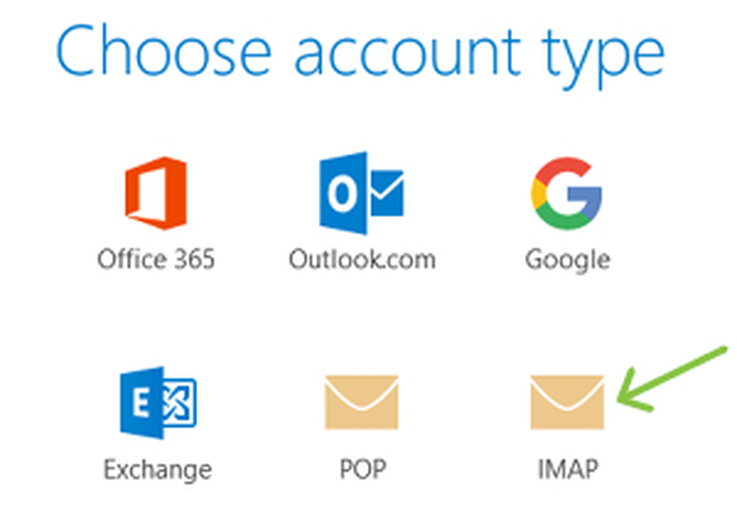
step 2
Select
step 3
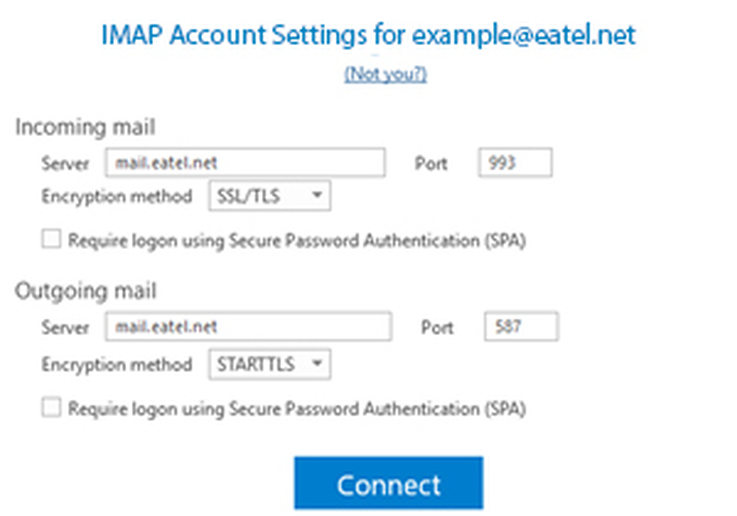
Enter the following email account settings and click
- INCOMING MAIL
- SERVER:
mail.eatel.net - PORT:
993 - ENCRYPTION METHOD: select
SSL/TLS
- OUTGOING MAIL
- SERVER:
mail.eatel.net - PORT:
587 - ENCRYPTION METHOD: select
STARTTLS
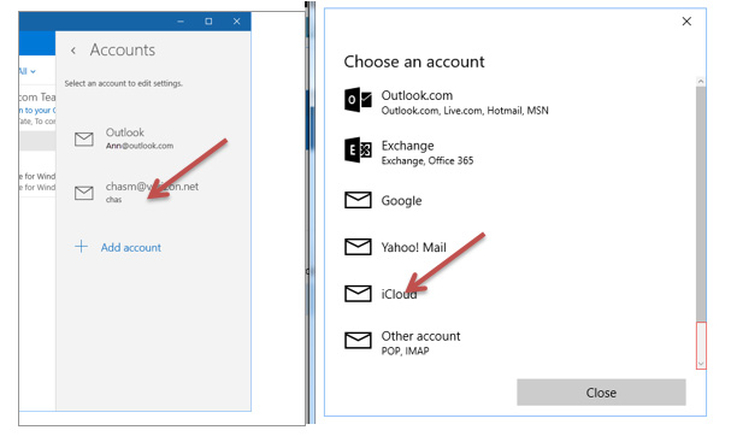
This tutorial was created using version 17 of Windows 10 Mail. If you are using a different version, these instructions may differ.
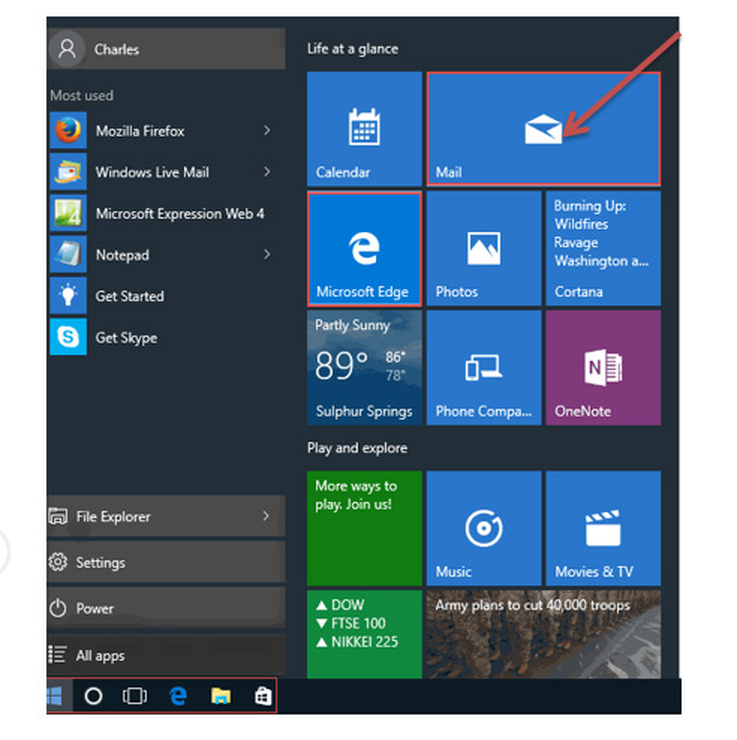
step 1
Click on the
step 2
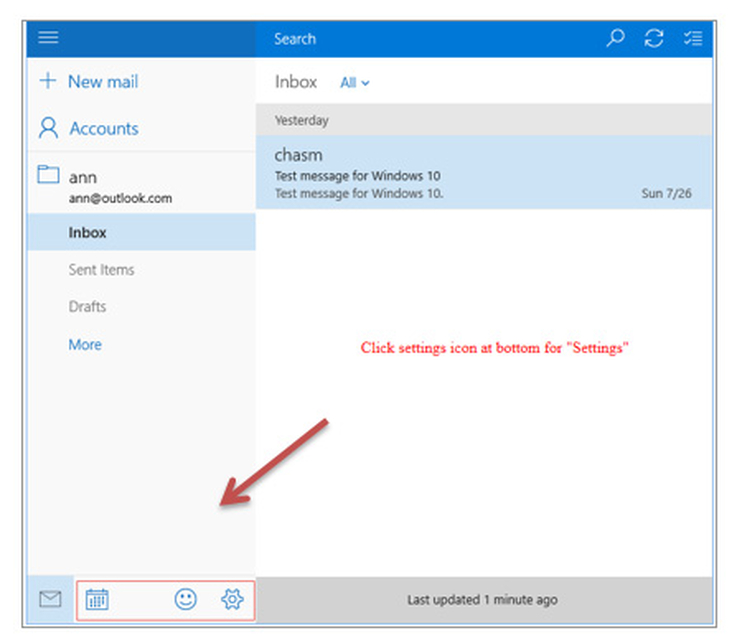
Click the
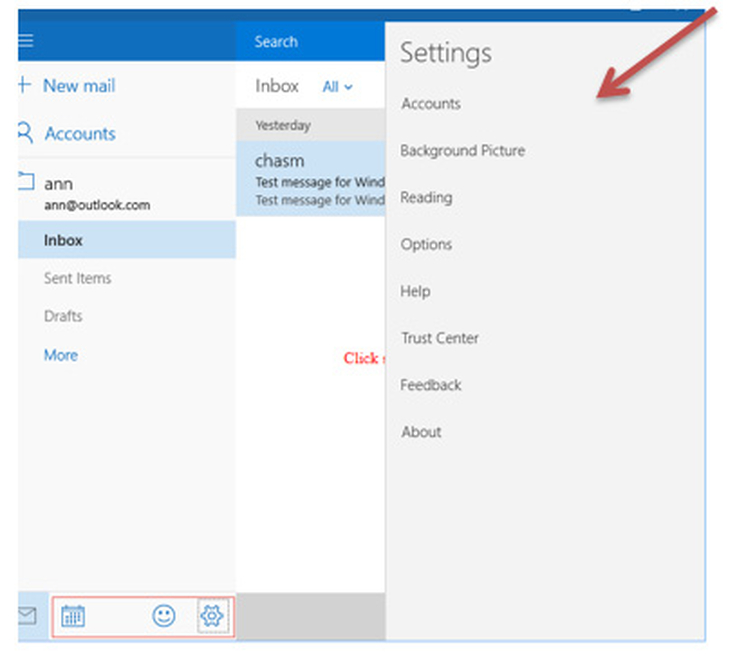
The settings panel will slide out from the right of the screen.
step 3
Select
step 4
Select
step 1
Click
step 2
On the Internet Account screen, click
step 3
Under select account type, choose
step 4
Populate the fields with your viscom.net information.
Check
- EMAIL ADDRESS:
[email protected] - This is the address that your contacts’ email program will reply to your messages from. This is also the address that will get recorded in their address book if they add you as a contact.
- PASSWORD: enter your password and
check the box labeledREMEMBER PASSWORD if you wish for your password to be saved - DISPLAY NAME: enter the name you wish recipients to see when they receive your message
step 5
Select
INCOMING MAIL SERVER INFO
- INCOMING MAIL SERVER:
mail.eatel.net - Change the port number to
993 - Check the box for
REQUIRES A SECURE CONNECTION (SSL)
OUTGOING MAIL SERVER INFO
- OUTGOING MAIL SERVER (SMTP):
mail.eatel.net - Change the port number to
465 - Check the box for
REQUIRES A SECURE CONNECTION (SSL)
step 6
Click
If your email client in not listed here, we’ve found a good website,
Both POP (Post Office Protocol) and IMAP (Internet Message access protocol) allow people to get access to their email from a remote server; however, that is where most similarities end. POP simply downloads email to your computer, and usually (but not always) deletes the email from the remote server. The problems arise if you have more than one device where you read your mail (desktop, laptop, tablet or phone). Here’s why it’s bad: You have to delete or file the same email on every device.
Logging into each device, you will see lots of unread emails with no indication of which you deleted, read, flagged or filed. Any folders you created and organize on one device won’t be replicated on the other devices.
IMAP allows users to store their email on remote servers. This two-way protocol also allows the user to synchronize their email among multiple devices, which is extremely important today, when most people have at least two devices – their laptop and smartphone.
